Glass Jar Version:
-Mod Podge
-Paper plate (or something to catch the unused glitter)
-A glass or old candle jar
-A paintbrush (sponge brushes work best)
-Your choice of glitter (This is Recollections Fine Glitter in Champagne from Michael's)
-Plant filler (optional)
Step 1: Open the Mod Podge and grab your paintbrush. Open your glitter and set it on the plate (this makes things easier during the next step).
Step 2: Simply brush the Mod Podge as evenly as you can on the inside of your jar (I got this jar at Hobby Lobby for $1.29). Make sure you reach all of the areas especially along the bottom and top.
Step 3: Sprinkle a good amount of glitter inside the jar.
*I have had success with all types of glitter (fine and chunky). Just choose the type that will create the look you are going for.*
Step 4: Begin turning the jar letting the glitter rotate and coat the inside. Add more glitter along the way if you need it.
Step 5: When you are happy with the coverage and have reached all of the areas, turn the jar upside down over the plate and gently tap out the excess glitter.
Step 6: Leave it to sit in a safe place over night to dry then add plant filler if you'd like. Plant filler is good to use when you are using the jar for makeup brushes or anything you want to stand up. For this particular jar it took the entire night and most of the next day to fully dry.
Final Product:
Repurposed Personalized Version:
*I have found the Bath and Body Works candle jars easiest to clean out with these steps. I have also done this with a Yankee Candle jar and it was more difficult.*
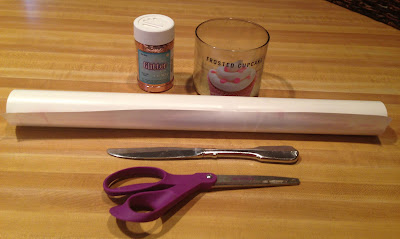
What you'll need in addition to what's listed above...
-Old candle
-Contact paper
-Knife
-Scissors
-Nail polish remover and cotton pads *not pictured*
Step 1: Put the candle into the freezer- you can do this overnight or for a few days. I do recommend letting it have about 5-10 minutes to thaw once you take it out of the freezer. If it is in there more 12 hours it will make the wax too hard to cut with the knife.
Step 2: Take your knife and insert it into the left over wax. Make a few cuts in the middle and around the edges. Insert the knife into the middle and twist to loosen the pieces. Then pull the large pieces of wax out. If the wicks do not come out during this step, don't worry! They will be taken care of in step 3.
Step 3: Run some warm/hot water into the jar. This will melt any un-removed wax and loosen the glue of the wicks so they come out easily. It also helps when removing the labels.
Step 4: Remove the label with your fingers and the sticker on the bottom with the knife.
Step 5: Take your nail polish remover on a cotton pad and wipe the jar clean. This will remove any left over residue.
Step 6: Take your contact paper and draw the design you want on your jar. I chose to do my first initial. Keep in mind that if you do a letter or number make sure to cut it out backwards. You need to do this so it will show up the right way once placed on the jar.
Step 7: Put your design on the inside of the jar. It's easily removable so if you mess up the first time don't worry!
Step 8: Once you have the sticker placed exactly where you want it, follow the same steps above for adding the glitter. The glitter I used here was from Hobby Lobby.
Step 9: Once the glitter is in place you need to remove the sticker. You need to do this before it dries because the sticker would be glued to the glass. You can use your fingers or a knife to help you.
Step 10: Let it sit to dry overnight and you're done!
I love doing this because it's such a pretty way to create storage that's inexpensive and girly! You can collect these jars (that would just go to waste) from your entire family and put them to great use. I especially love using these for makeup brush, eyeliner and mascara storage. They look so pretty up on the shelves above my vanity!
Hope you enjoyed my first DIY! Please let me know if you try it and how it turned out!
Love, Lacey


No comments:
Post a Comment